While not too commonly used here in Ontario, clamp on portage pads seem to be quite popular in the Boundary Waters region. I picked up a pair of Stewart River pads back in 2011 and they have been used on the 15' Langford with modest success.
Stewart River pads
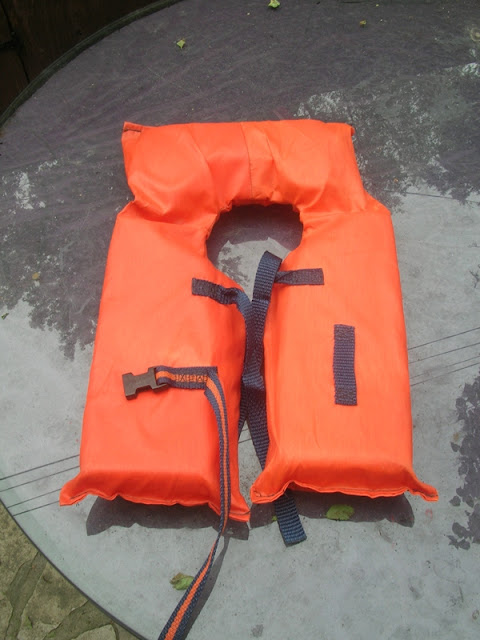
I like repurposing whenever possible and the opportunity came up to make use of some free discarded stuff. During an end-of-season shoreline cleanup on the cottage lake last fall, I came across a barely used kid-sized, keyhole style lifejacket tangled in some reeds. There was no name on it and a listing on the lake association's lost and found page has turned up no claimants.
The foam inserts seemed perfect for this project so it was cut up and the innards removed. The orange nylon will be re-purposed into some rope bags or sacks for tent pegs.
Anyway, I searched online for a tutorial on making pads and came across this very descriptive writeup here. Many thanks to the author for outlining the necessary hardware. In my case for the wooden base, I used pine cutoffs from the recently completed plank seat experiment. These were originally slats from an IKEA bed that someone discarded on garbage day.
Discarded Ikea bed slats
I basically followed the tutorials instructions but used 2 1/2" carriage bolts simply because I had them. For the metal bar, I used a 4" straight steel brace commonly used in shelving. The holes in the brace are offset which explains why the carriage bolts don't look aligned. Here is a picture of the wood bases (3.5" wide by 8" long) along with the foam from the lifejacket.
The foam was easily trimmed to shape but before wrapping in canvas, I wanted to test how many layers would be suitable for the pads in order to be comfortable but also reduce the bulk. The Stewart River pads are 4" thick. After temporarily wrapping the wooden bases with foam and rubber bands, I attached them to the canoe for a test run.
Testing out the foam
After tinkering by removing or adding foam layers, I settled on 5 pieces per pad which worked out to about 2 1/4" of padding. With the 3/4" wooden base that worked out to 3" overall height for the pads.
The wooden base was laid down onto some brown material (left over from a weather treated canvas tarp). Here you can see that the metal support bar was also wrapped in black duct tape to avoid scratching the wooden thwart when attached.
I differed from the original tutorial in the fold up technique to minimize the folding. Started by stapling the top and the bottom.
Then the edges were tightly brought in and stapled for a more square effect.
Here's a final pic of the underside. Certainly not professional but good enough for the job, especially for an area that won't be that visible in the end.
Attached to the centre thwart, the pads should make this relatively heavy 14 footer a bit easier to manage


1 comment:
For a ready to purchase option I really like the sling-style pads. Bolt and clamp-on styles are available. Here is an example http://www.hemlockcanoe.com/chosen-valley-sling-style-pads.html
Post a Comment