Showing posts with label Paddle Accessories. Show all posts

Thursday, August 4, 2022

Modified pole garbage spear

This year, I was quite shocked at the amount of garbage and human-created debris polluting our cottage lake. Every quick jaunt in the canoe revealed sunken aluminum cans, floating plastic bottles, golf balls thoughtlessly shot into the lake for entertainment with the shoreline marred by abandoned debris of all kinds. I ended up signing up for a program called Clean Muskoka Together, a district wide initiative where volunteers are provided with safety gloves and specially marked bags for collecting recyclables and waste. These bags can then be left at various municipal waste stations at no cost for proper disposal.

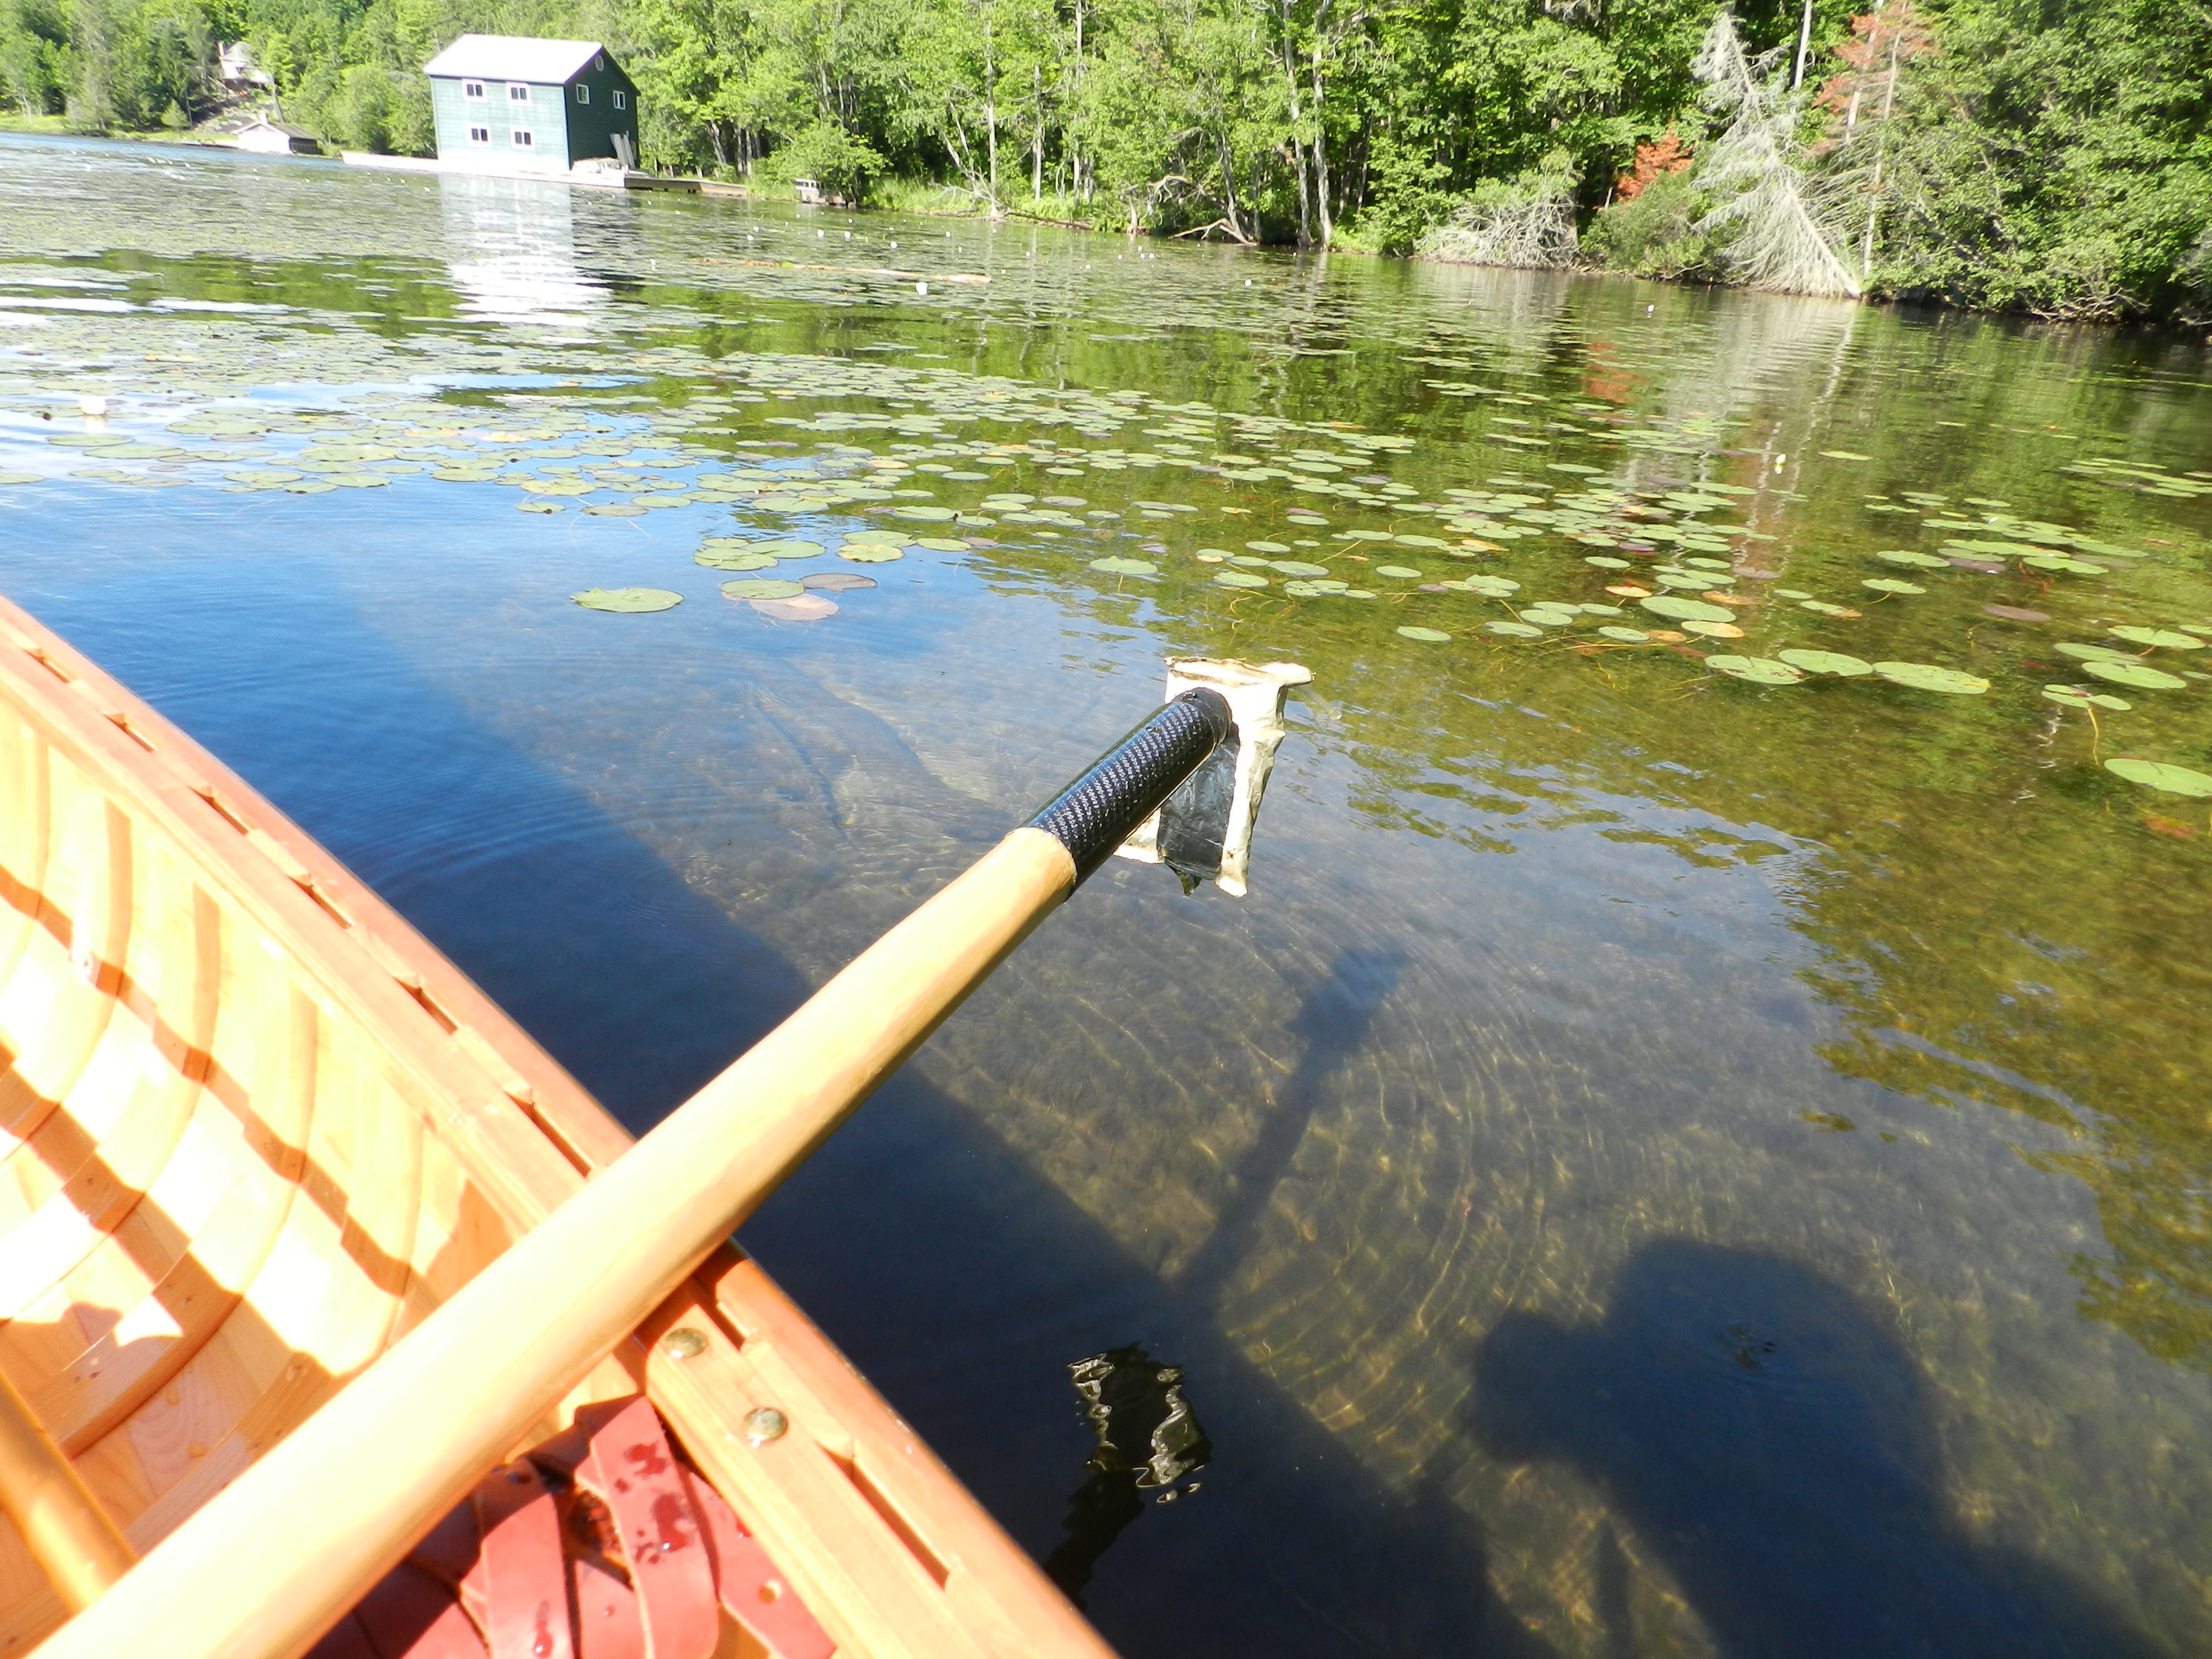
As part of my own kit to tackle the garbage problem, I adapted a piece of homemade equipment to make extraction of items from the lake bottom a bit easier.  Back in 2017, I had made a 12 foot, two-piece canoe pole out of some spruce lumber and a carbon-fiber ferrule.


The top half of the canoe  pole contained the hollow, female end of the ferrule with a roughly 35 mm inner diameter.  This formed the basis for the spearing tip as a scrap piece of plumbing tubing fit nearly perfectly in this space. A bit of hockey tape was used to create a friction fit so that that this second inner tube is tight enough to hold but can also be removed to return the pole back to its original intended use. The actual metal spear tip was created with an old pair of emergency ice picks which I used to carry years ago when snowshoeing on frozen lakes in the area.  Mine were a similar set to his stock photo:


I removed the straps from the set and jammed one of the ice picks into the inner grey tube. The foam handle of the ice pick itself fit tightly within the diameter of the grey tubing for another friction fit. A bit more hockey tape and the whole thing was quite secure.


The second ice pick can be secured to cover the sharp point so I don't damage the canoe when the spear is not in use.


The spear worked great. Here it is in action collecting a sunken aluminum can...


The spear has also been useful to extract plastic bags tangled up on shoreline rocks and branches as well as broken fishing lures snagged on rocks. I was also able to extract a half buried, six foot long piece of vinyl siding from where a boathouse was under construction. It is likely this bit of debris was never retrieved from the lake when new siding was being put up. Here's a photo bringing the construction waste out from its watery grave....


On subsequent trips I removed floating real estate signs which had been nailed to trees and broken off, 2 five gallon buckets awash on the shoreline, a floating plastic kids chair, multiple abandoned floating toys, discarded rubber dock edging and even some sunken scrap metal.


But by far the most disappointing find was the incredulous amount of golf balls simply shot into the lake. While there is a lakeside golf course at one of the resorts where a small bay forms a water hazard, these balls were found in areas no where near the course and had obviously been shot into the lake for just the heck of it. Scooping the balls out required a proper golf ball retriever tool. In the end, a total of 46 were removed from multiple regions of the lake.


Online research into golf ball toxicity reveals that they take centuries  to degrade all while shedding irretrievable microplastics into the watershed.. Well before then,  heavy metals (especially zinc) leach from the inner core and add toxicity to the aquatic ecosystem, poisoning plants and fish. 
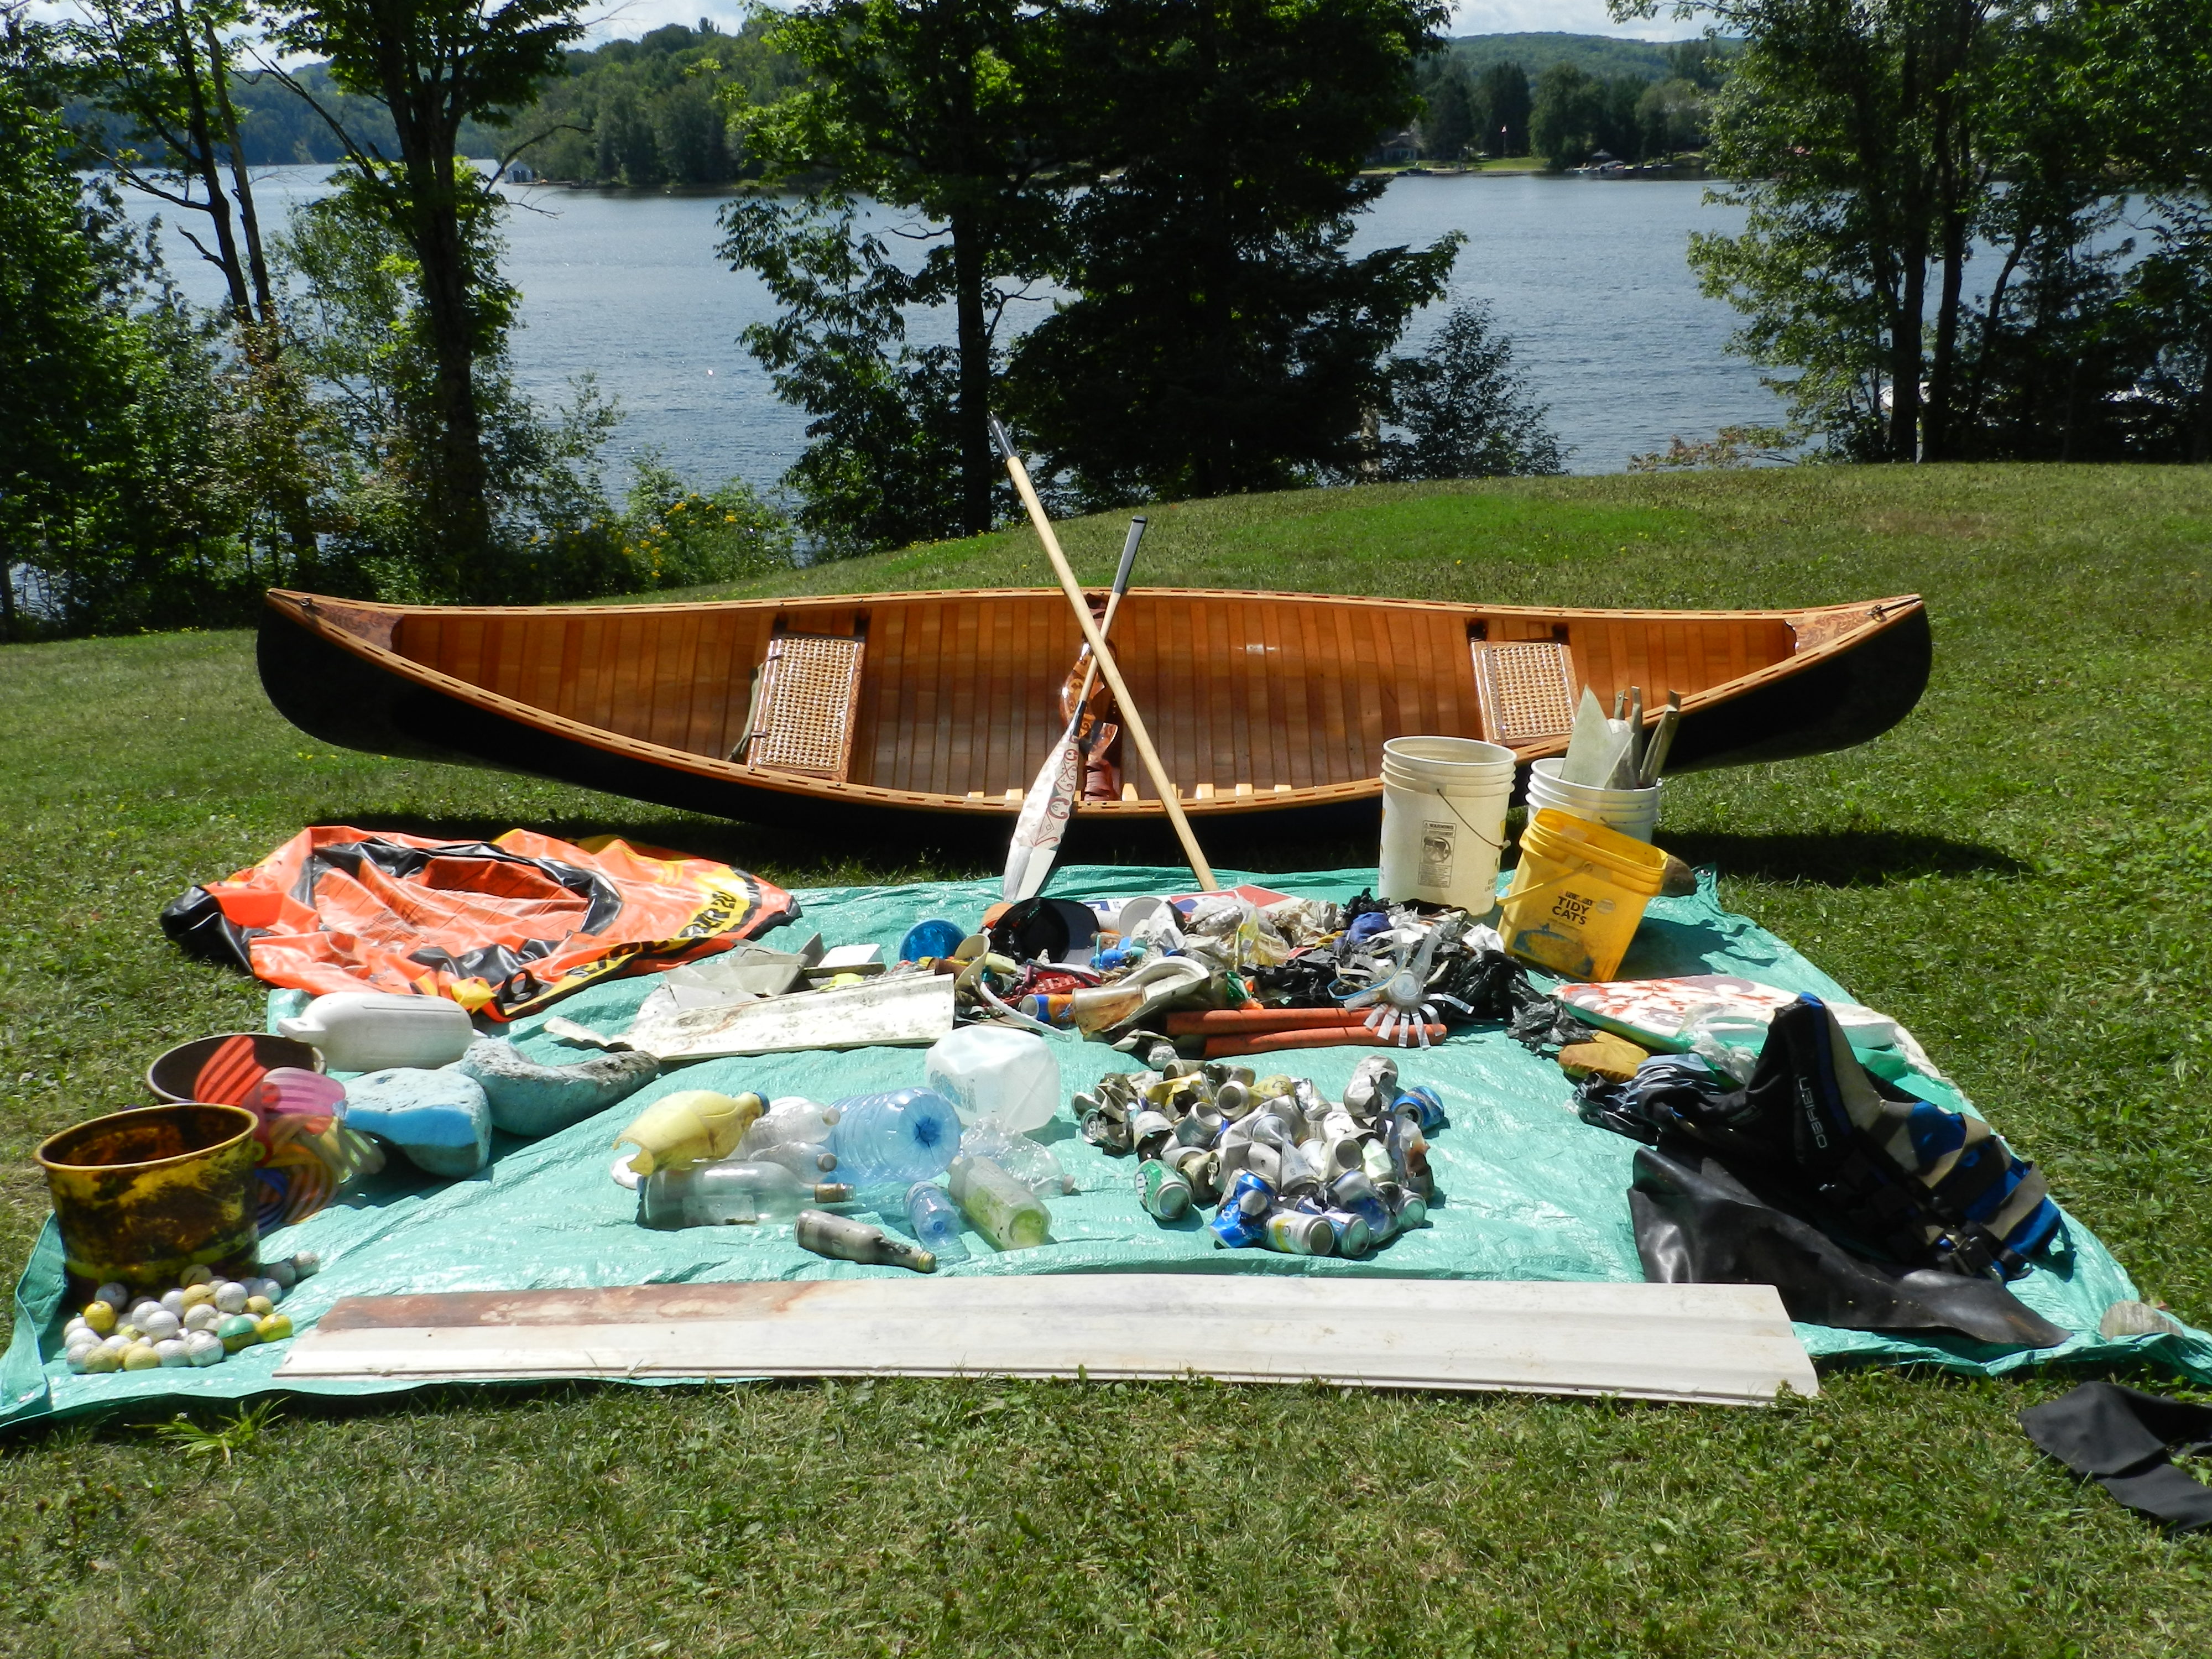
As part of final message to our cottage community, I laid out all the debris onto a tarp on our property so folks could visualize the unnecessary amount of human created rubbish just one person could remove if an effort was made. Hopefully folks will be more conscientious of their waste production. The final tally of litter collected in just 8 trips on the lake weighed a staggering  69.75 pounds! That's over 20 pounds heavier than the 14 foot cedar-canvas canoe used in the collection!


Items included:
  • 3, five-gallon buckets
  • 11 pounds of sunken scrap metal
  • 6 foot piece of vinyl siding
  • 46 golf balls
  • 6 tennis balls 
  • 35 sunken aluminum cans
  • 13 single use plastic bottles
  • 2, five-litre water jugs
  • 2 glass wine bottles
  • 31 feet of sunken line / rope
  • broken real estate signs
  • 2 waterlogged PFDs
  • a punctured 2 person inflatable raft
  • broken 40" foam bodyboard
  • sunken buoys and rubber dock edging
  • numerous bits of food wrappers, plastic bags, snagged fishing lures, bits of dock foam, punctured inflatable vinyl floaties, plastic beach toys


Calculations revealed I paddled approximately 66 km during these multiple trips effectively travelling 3 times the perimeter of the shoreline as part of the cleanup effort.

.

How I Spent my Summer Holiday


Wednesday, January 20, 2016

Found on Archive.org: Moriarty's Neverslip Pick and Socket Paddle Spike

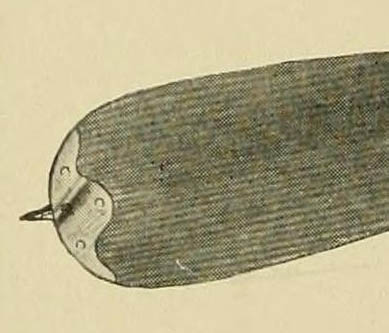
Here's a curious (and potentially dangerous) bit of paddle related gear from an advertisement in the 1907 edition of In the Maine Woods. 


Moriarty's Neverslip Pick and Socket was a sort of paddle tip protector with a sharpened metal point. A claim on the right side of the ad states, "Makes Paddle a reliable Setting Pole"


Pick & Tip Protector

Somehow I'm picturing a new comic book hero. A crime-fighting, canoe paddling eco-warrior ensuring people don't trash backcountry sites. I think this would be his/her weapon of choice.


Sunday, August 18, 2013

1942 Potomac Canoe Trip

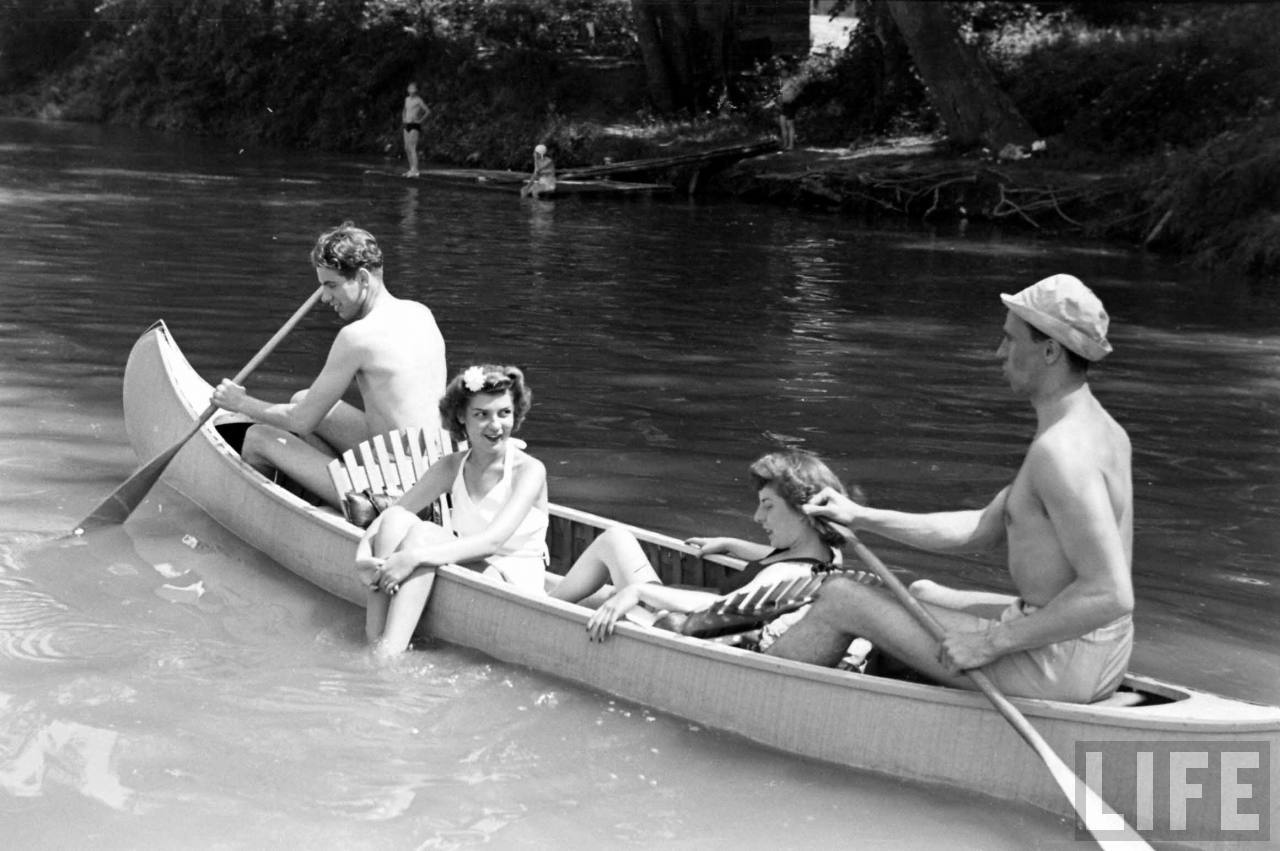
Not directly related to paddle making, but I'm a sucker for these vintage canoeing pics. These ones are LIFE magazine from a series entitled "1942 Potomac Canoe Trip". Love the second shot - the ladies seem perfectly relaxed.  Think I'll be scrounging around some scrap wood to build an appropriate backrest for my special lady.


Potomac Canoe Trip
Date taken: July 1942
Photographer: Thomas Mcavoy
For Personal, Non Commercial Use


Tuesday, April 9, 2013

Boys Life (1953): Making a Leather Tumpline & Wanigan

Here's a great little page from Boys Life, July 1953 for anyone wanting to make some traditional canoe gear. The double article features plans for a wanigan and a quick photo series on making a leather tumpline. Click the link or the image for a larger view...

Source Link: Boys Life, July 1953


Friday, March 1, 2013

Different Paddle Portage Pics...

Came across an interesting illustration of the portaging method in The Way of the Woods, by Edward Breck (1908). It showcases the method of lashing paddles to the center thwart to shoulder the canoe. What caught my eye was how the paddle shafts are pointed to the stern and the canoeist is gripping the thwart in front. This seems reversed to most methods I've seen where the shafts face forward and has been labeled "Micmac Style" by the author.


Reverse Paddle Carry
The Way of the Woods  p.94


This method is also demonstrated in a YouTube video of Tim Smith of Jack Mountain Bushcraft showcasing this method on a portage on his video,  Canoe Expedition Course (7 of 15) (go to the 1:30 mark to see). Seems to work well if you have a quarter thwart positioned in the perfect spot.


Contrast that to the more common carry method illustrated from Homer Halsted's later publication, How to Live in the Woods (1948). An image from page 124 shows the details for lashing and the paddle facing forward so the canoeist can hold the shafts for support...

How to Live in the Woods  p124


Still another method is to lash the paddles (shafts forward) but tied together by a single lashing so that the paddles are no longer parallel. I first came across this method described as the "Montagnais" method described in Paul Provencher's book, I Live In The Woods (more about that book in this post here)


Montagnais Tying Method


The last version of this is to reverse the paddle position and cross the blades on the forward thwart while lashing the grips to the center. Came across this in the online book, Building the Chippewa Canoe by Robert E.  Ritzenthaler.


"Chippewa Portage Method"


The last method is the method I tend to favour with my smaller 14' cedar canvas as it feels less claustrophobic to me. The combination of the tump and contoured yoke make for an easy carry. The blade forward position makes the bow a bit heavy, but this is offset with the fact that I lash my kneeling pad and some other stuff to the seat in the rear and that creates some balance...

 
My Paddles lashed in for portage  


Saturday, February 9, 2013

Canoe Camp Shelters

Back in the summer after my poling excursion on the Big East River, I made a quick canoe camp shelter for some relief against the heat and sun...


Canoe shelter with tarp, paddles, & pole

It was fun to rig up and got me curious to search out images of other temporary shelters rigged up in a similar manner.  One of my favourites is this photo dated to the 1860's of a Maliseet canoe camp. The bark canoe is propped onto its side with a tarp supported by their poles & fishing spears...

Campsite at Blue Mountain on a bend of the Tobique River c. 1862.
(Provincial Archives of New Brunswick, P5-253)


Canoeing, sailing and motor boating by Warren H. Miller (1919) has an image (p.145) featuring a comfortable canoe camp, where the hull of the canoe serves as a headboard of sorts and shelving for various supplies. The tarp is being lifted with a canoe pole...you can just see a metal shoe at the base. While this looks too permanent with the cots and bedding, the setup looks tempting to me next time I'm poling...


Here's one I came across in Boy's Life, March 1944 showing how the canoe can be supported with paddles lashed to the gunnels while a small rain poncho is tied off . Not much headroom here but interesting...
Boy's Life, March 1944


An image from Hesketh Prichard's enthralling read, Through Trackless Labrador (1911). Here a complete absence of trees meant improvising a shelter to escape the wind.
Through Trackless Labrador (p. 70) 


Edward Breck's 1908 publication, The Way of the Woods, has a basic setup of a propped up canoe on pg. 75

Sketched image from The Way of the Woods (1908)


I found the source of this artistic image when perusing through the 1910 online version of In the Maine Woods (p.40) on Archive.org.


Boy's Life, April 1957 has a brief writeup on Lean-To Shelters including a sketch of a canoe shelter with a rigged tarp and forked sticks holding up the overturned canoe. It looks comfy only because the paddlers are tiny kids - no way I'd fit under an overturned canoe like this...

Boy's Life, April 1957


This one from Popular Science, May 1962 seems a little too involved, but at least the canoe is ready to portage after breaking camp...
Popular Science, May 1962


For a modern day look, check out some of the great photos over at Path of the Paddle Canoeing & Bushcraft of their various tarp shelter setups


Wednesday, January 23, 2013

Canoe Camp Stool Project

One of the winter projects I've been working on is a folding, portable camp stool - something that would fit easily into my Woods 200 pack. Ended up inspired by this online tutorial from  Wood & Faulk...

Wood & Faulk Camp Stool


Although I didn't have the exact hardware as the tutorial, some other usable bits were found that worked adequately (3" long, 1/4" carriage bolt with wing nut; 3/16th eye bolt & wingnut). The legs were made from some left over 1-1/4" dowels that were collecting dust in the basement. 2 of the legs in my version are poplar, the remaining leg an older piece of red oak. The assembly pictures & instructions are very clear in the original online tutorial so didn't take pics of those steps.

I don't usually carry a camp chair when paddling but thought this might be a nice compromise. When it's not in use on trips, I plan to use it to do some carving in the backyard. However, instead of using the original tutorial design of bolting the seat permanently to the legs, I wanted a more flexible solution that would also allow just the seat to be removed. Another online tutorial from Willow Haven Outdoors incorporated a design with folded ends where the legs fit by simple friction. This way, as a lighter option,  just the seat could taken with legs fashioned in camp from thick branches lashed together.

I had a nice piece of tooling leather left over from other projects that just fit the bill and fashioned a simple triangular design for the seat on the underside of the leather

Folding legs rigged up and leather template of seat

Kind of got lazy here and decided to use my surplus of copper rivets to secure the end flaps rather than stitching...

Ends folded over and riveted

The test run for the camp stool worked and supports my ever growing weight, but the plain leather seat was just calling out to be decorated....

The basic design


Similar to the Nook eReader case I made back in 2011, I ended up burning a canoe related theme to the seat - this one influenced by my new attempts at canoe poling. The image is from the 1941 etching entitled "Canoe Man" by  Frank Weston Benson (1862 – 1951). 
Canoe Man (1941) by Frank Weston Benson


I thought the scratchy nature of the artwork would work well burned into the leather. The image had to be modified somewhat to fit the triangular dimensions of the seat. Here is the incomplete image being burned...

Burning the image


I while back I was asked about the tools used for decorative pyrography. I use the Canadian made Razortip SK Pyrography machine. Great little contraption that allows for a range in shading tones. Here is the end result of the seat before sealing with a waterproofing conditioner which darkens the leather a bit...

Decoration Complete


The bottoms of the dowels were crudely rounded with a crooked knife so the stool would rock less. To seal the dowels, some left over deck stain was used giving them a warm reddish tint. Here is the stool against another dusting of snow in Toronto.

Canoe Campstool


With the seat removed, the legs collapse back into an easily transported package...

Folded secured legs for storage

So there's another piece of homemade canoe camping gear for the upcoming season.


Friday, October 19, 2012

Ebay Copper Paddle Tips

An Ebay seller has a pair of copper paddle tip protectors which are apparently from the 1950's.  Back in 2010, I wrote a brief post on these old-school paddle accessories for anyone who is interested...

Seller Details:
Vintage 1950's - Copper Row Boat Oar - Canoe Paddle - Protectors, Decorative end caps


Thursday, August 9, 2012

Temagami Style Carrying Bar

One item on my endless to do list of projects was to carve a new centre yoke for the 15footer cedar canvas canoe since the the current, no-frills centre thwart is quite uncomfortable for portaging. Some old-school authors and builders believe that a single centre thwart bolted onto the gunnels is a potential weak point in the construction arguing that the role of the thwart is to simply spread out the hull to the desired width and not meant to bear the weight of the canoe when portaging. 

Close inspection of the attachment points of the thwart in my canoe show some stress related splits that have occurred. You can just make out a split in the inwale around the 2 attachment points. 


Installing a new yoke will also likely also mean having to do a time consuming inwale restoration or splice might be in order but I want to start using this no-name, amateur built canoe for some upriver tripping ASAP. 

Writings about native methods of portaging birchbark canoes mention a "carrying bar" - basically a piece of wood that fits over the mortised centre yoke and stretches over the gunnels thereby providing support when the canoe is flipped over. In the Temagami region of central Ontario where camps still use heavy cedar canvas canoes, the carrying bar is still used to prevent potential weakening of the gunnel structure.

Here's a photo of one such carrying bar rigged up with cord and a tumpline from the wonderfully illustrated Canoeing Wilderness Waters by Heb Evans


Normally, the bar is made with a scrap piece of spruce or pine and notched to fit over the gunnels. It is securely lashed to the center thwart with cord is a series of Marline Hitches so that paddle blades can be slipped under and used as a temporary yoke. A tumpline is also secured around the whole apparatus

Found an online article in Boys Life (July 1951) that shows describes this classic method of portaging. Hopefully this embedded article will appear in your browsers below.


Instead of using pine or spruce, I had some very lightweight 8/4 Sassafras pieces left over from some paddles. A nice chunk with one straight edge was almost a perfect width for this project. The ends were cut to fit nice and snuggly over the thwart.

Scrap piece of Sassafras

Ends notched to fit over gunnels

Came up with this idea to combine the carrying bar with the Stewart River portage pads picked up last season. Basically some additional notches were cut to accomodate the pads and once they were secured with their bolts and wing-nuts, the whole apparatus was secure. The tumpline was lashed in using the methods described by Heb Evan in his book. This way I can still lashed the paddles in reverse style with the grips on the thwart and the blades resting on the seat while comfortably (relatively) supporting the canoe on the shoulders.


Aug 10 Update: Received a most informative email from Brian Back, Keewaydin Camp Historian, with some corrective details about traditional carrying bars used by the Temagami camp. Here's his info...
"The traditional carrying bar was not lashed with marline hitches, though it appears so in the photos. Nor are there any overhand knots on it. The lashing actually doubles back to form a double lash. The single lash wears out quickly where it meets the edge of the paddle. For some reason Heb’s photo is not of the double-back lashing. The carrying bar in that photo has been hand routed (also can’t be seen) in the traditional way to prevent the lashing from slipping from the left and right anchor points."

Apparently there is plenty of info about tumplines and other traditional wilderness canoeing methods in Back's book entitled, The Keewaydin Way  for anyone else who may be interested.


Older Posts Home Page