Showing posts with label leatherwork. Show all posts

Saturday, March 25, 2017

Fixing an old failure - scarfing a grip onto a sassafras northwoods - Part 3

Here's the end story with the scarfed sassafras paddle. The previous post on this paddle  mentioned that the blade had weathered after being exposed untreated for years in the backyard garden. One side had turned into to a light brown colour while the more exposed face oxidized into a greyish black patina. 

Different sides of the weathered blade

After carving down the shoulder and throat and shaving off the weathered top layer, the now golden hue of the sassafras came out with no signs of wear. Between the blade weathering, the darkened sassafras and the light creamy new sassafras grip, the paddle now had 3 distinct colour tones. Briefly considered scraping off the oxidized layer and staining the light wood to match the rest of the paddle, but some online feedback suggested to leave it alone. The old wood and new wood obviously contrast but it'll be a reminder of how this paddle pretty much came back from the grave. 

However, for practical purposes I decided to add a leather wrap around the shaft using 1/2" wide, 60 inch long saddle string leather collecting dust in the leather supply box.
1/2" x 60"  Saddle String

I've already described my method of attachment in this previous post  from 2009 so didn't take any new photos of the process. Many of the links in the post from back then are no longer active but my photos and description is the same. Trim  roughly 4" from the ends to a point, tack on the bottom, soak the leather in warm water and then stretch tightly around the shaft. Using a clamp to hold the bulk of the wrapping, the final bit is stretched out and the final tack is secured. After drying, the leather shrinks an securely grips the shaft. It is then waterproofed using Sno-Seal applied with a heat gut and brush. So far this method hasn't failed me but it does rely on the waterproofing treatment to prevent the the leather from soaking through and likely getting loose again. So once a season, I apply more Sno-Seal to the other wrapped paddles and they are good to go.

Closeup of wrap. Pins not visible but are on the other side...


So here it is...a resurrected paddle. It'll have to wait a few more weeks until it gets dipped in the water.

Paddle Complete


Tuesday, March 29, 2016

New Paddle Pics from Max N

Max N of Woodsmans Finest has sent in another pic of his paddle creations. New amongst this set is the paddle in the centre decorated with the classic Scarlet Red HBC point blanket colours...


Photo courtesy Max Neukäufler

For a while,  Hudson's Bay was offering a generic laminated paddle decorated with this colour scheme (see link to my previous post here), but it no longer seems available on the company site. Max's version decorated with natural milk paints on the blade and grip looks much finer in my opinion


HUDSON'S BAY COMPANY Scarlet 60 inch Paddle


Along with spoons, knives and firesteels, Max has also branched out to include leather tumplines. Here's a sample of his work if anyone is interested in obtaining one...

Photo courtesy Max Neukäufler


Wednesday, October 7, 2015

Pack Cloth & Tumpline - Part 2

After posting about my interest in attempting the old school pack cloth technique I got to work using some of the material I have on hand. First off here is a writeup of the components...

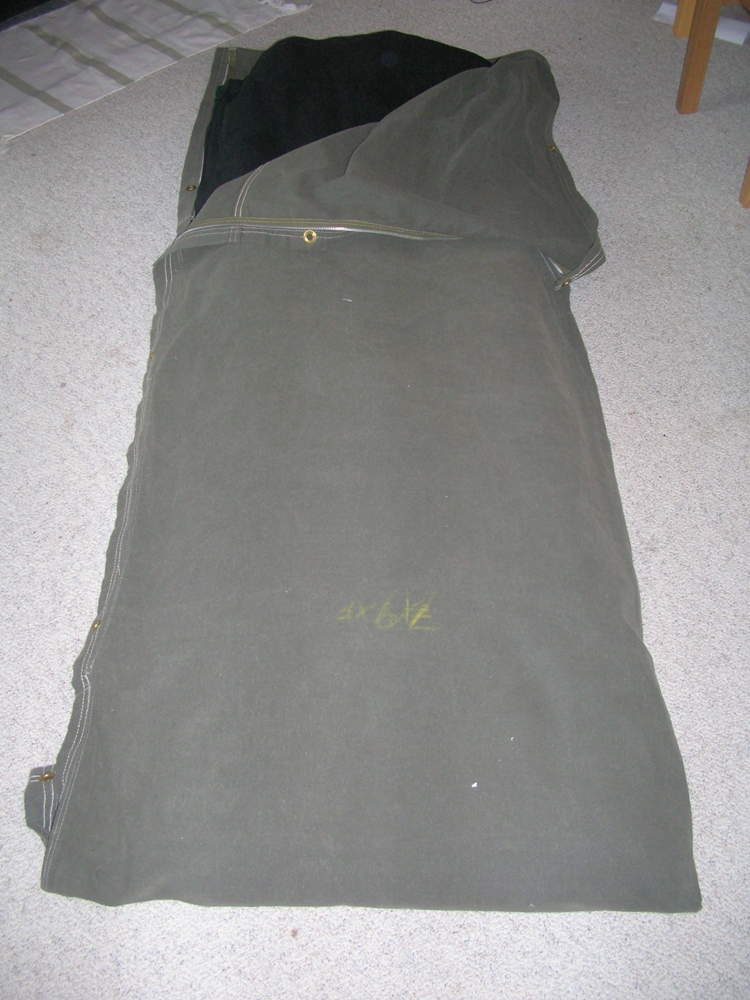
Canvas tarp bedroll cover
A while back when the Canadian dollar was nearly at par with the US, I purchased a homemade canvas bedroll off of Ebay. My intention was to use some wool blankets and have some nice bushcrafty like sleep with an open fire. The maker simply took a 12oz,  7'x9' firetreated, marine tarp and stitched up the bottom. He added a large military zipper up the side. Seems like he might've been desperate to sell, because I  won the bid for just $40 with a very reasonable shipping fee. Just the tarp alone costs around $70 around these parts.

Canvas Tarp Bedroll


Inflatable Sleeping Pad
Last summer I had planned to do some basic car camping with my elder son. Since I usually go solo and use a hammock system, some new gear was necessary. After researching new tents and some inflatable sleeping pads, I decided on this heavier (but comfortable) MEC Super Reactor double pad to ensure we both had some good sleep. Luckily before pulling the trigger on a new one, I found an ad for the same pad being sold off by another father. It had been used once when a bear encounter at a provincial park scared the crap out his daughter. That bear saved us $85 and an expensive parking trip downtown to the always crowded MEC store.

The double pad has a slight seam down the middle where it is folded to fit into its stuff sack. Turns out, the pad can be folded in half when inflated to serve as an ultra luxurious mattress. It fits perfectly into the canvas bedroll cover in this manner


 The fully opened MEC Super Reactor Pad


Folded in half before slipping into the bedroll


Sleeping Bag
My sleeping bag is an older generation, MEC Gosling bag insulated with down and rated to +5C. I've used it hammock camping in a Hennessy Hammock and have always been quite happy with it. In addition, I've also used a fleece liner bag to increase the warmth when the temperature drops. While not in the picture below, the fleece liner can be seen in the indoor bedroll photo at the beginning of the post.


Pad and sleeping bag inside canvas bedroll 


Pillow
Instead of dropping more funds on commercial camp pillows, I use an old laptop computer sleeve that has fuzzy fleece on the inside. Turn it inside out, stuff it with spare clothes and it works just fine

My comfy pillow


Waterproof Ground Cloth
This was just a common 6x8 poly tarp to serve as a waterproof outer layer in my bundle. 

Missing: Shelter Tarp
The one component missing in my attempt is the shelter tarp which in fact would be rolled up as the "pack cloth". I've been working on making my own (cheap) canvas tarp for occasional usage and a new post about that will be coming soon. In the meantime, I went ahead and used the 6x8 green poly groundsheet as my pack-cloth just to see if it could be done. Below are the steps I used and the result...


Forming the Pack Cloth Bundle

The canvas bedroll with its inner components was zipped up and placed in the centre of a 6x8 poly groundsheet with the excess canvas material tucked under leaving about 12" or so of tarp and the top and bottom


The tarp was folded over at the head and foot of the bedroll and then the tumpline was layed down like described in the readings, with the "tails" running down the side of the canvas bedroll and extending out past the bottom of the tarp


At this point the sides of the poly tarp are folded over to the centre of the bedroll. Given the slippery nature of the synthetic poly tarp the whole thing started opening up in the middle. I suspect when I repeat this with a larger canvas tarp shelter (another work in progress), there will be more overlap and protection.


Now the head and foot of the bundle were folded over to the centre point like so...


... and then the head part folded over again. You can see that the tumpline strap from the headband and the tail are now right next to each other.


While holding onto the headband strap and straddling the bundle between my legs, I pulled on the tail piece and watched as tarp began to tightened up. At this point, the tail piece was secured with a tump knot (basically a figure 8) and the procedure repeated on the other side


With the sides tightened, the tails were brought over to the centre of the bundle and crossed.


The bundle was rolled slightly and the tails tied off.


Here's what the completed bundle looked like.


In retrospect, I should've been more careful with aligning the headstrap at the beginning of the process, because it ended up a little off centre. Something to know for next time. 

Once it was all tied up, I wanted to give it a whirl and see how the bundle carried in the canoe along with the wanigan. Here is everything loaded up along the shore of the cottage lake.


The bundle fit snugly under the gunnels just forward of the centre yoke, although it wouldn't have much room to move if I needed to shift the gear forward. 

While using the pole the bundle got wet from the splashing and such but the tightly wrapped poly tarp did its job in protecting everything inside. I think for a quick poling overnighter trip, this system might be a fun method although I'm not confident it would be completely dry in a prolonged submersion.

Here's  a view poling in some shoreline shallows amongst the lilypads.



Tuesday, April 9, 2013

Boys Life (1953): Making a Leather Tumpline & Wanigan

Here's a great little page from Boys Life, July 1953 for anyone wanting to make some traditional canoe gear. The double article features plans for a wanigan and a quick photo series on making a leather tumpline. Click the link or the image for a larger view...

Source Link: Boys Life, July 1953


Wednesday, January 23, 2013

Canoe Camp Stool Project

One of the winter projects I've been working on is a folding, portable camp stool - something that would fit easily into my Woods 200 pack. Ended up inspired by this online tutorial from  Wood & Faulk...

Wood & Faulk Camp Stool


Although I didn't have the exact hardware as the tutorial, some other usable bits were found that worked adequately (3" long, 1/4" carriage bolt with wing nut; 3/16th eye bolt & wingnut). The legs were made from some left over 1-1/4" dowels that were collecting dust in the basement. 2 of the legs in my version are poplar, the remaining leg an older piece of red oak. The assembly pictures & instructions are very clear in the original online tutorial so didn't take pics of those steps.

I don't usually carry a camp chair when paddling but thought this might be a nice compromise. When it's not in use on trips, I plan to use it to do some carving in the backyard. However, instead of using the original tutorial design of bolting the seat permanently to the legs, I wanted a more flexible solution that would also allow just the seat to be removed. Another online tutorial from Willow Haven Outdoors incorporated a design with folded ends where the legs fit by simple friction. This way, as a lighter option,  just the seat could taken with legs fashioned in camp from thick branches lashed together.

I had a nice piece of tooling leather left over from other projects that just fit the bill and fashioned a simple triangular design for the seat on the underside of the leather

Folding legs rigged up and leather template of seat

Kind of got lazy here and decided to use my surplus of copper rivets to secure the end flaps rather than stitching...

Ends folded over and riveted

The test run for the camp stool worked and supports my ever growing weight, but the plain leather seat was just calling out to be decorated....

The basic design


Similar to the Nook eReader case I made back in 2011, I ended up burning a canoe related theme to the seat - this one influenced by my new attempts at canoe poling. The image is from the 1941 etching entitled "Canoe Man" by  Frank Weston Benson (1862 – 1951). 
Canoe Man (1941) by Frank Weston Benson


I thought the scratchy nature of the artwork would work well burned into the leather. The image had to be modified somewhat to fit the triangular dimensions of the seat. Here is the incomplete image being burned...

Burning the image


I while back I was asked about the tools used for decorative pyrography. I use the Canadian made Razortip SK Pyrography machine. Great little contraption that allows for a range in shading tones. Here is the end result of the seat before sealing with a waterproofing conditioner which darkens the leather a bit...

Decoration Complete


The bottoms of the dowels were crudely rounded with a crooked knife so the stool would rock less. To seal the dowels, some left over deck stain was used giving them a warm reddish tint. Here is the stool against another dusting of snow in Toronto.

Canoe Campstool


With the seat removed, the legs collapse back into an easily transported package...

Folded secured legs for storage

So there's another piece of homemade canoe camping gear for the upcoming season.


Tuesday, January 24, 2012

Leather Solo Seat

Another off-season project I have been gradually working is a leather sling seat for the 15ft cedar canvas canoe. Paddling solo means kneeling as close to the center point of the canoe as possible. With my shorter, symmetrical 14foot canoe, the bow seat is perfectly positioned to paddling the canoe "backwards" so that my rump can rest on the edge of the seat and take weight off the heels if needed. With this option and full kneeling on the bottom of the hull, paddling the 14 footer is a joy.

The longer 15ft cedar canvas logically has its seats positioned further towards the ends of the canoe and paddling in reverse while resting on the bow seat results in an awkward stern heavy position when the boat is unloaded. So a solution was in order. I considered the idea of adding a permanent kneeling thwart but then wanted to explore a more removable option - hence the pursuit of a personalized sling seat.

Tom Seavey of Azland Traditions is the creator of Original Saddle Seat. I've seen a few first hand at some canoe gatherings and have always admired the quality leather workmanship. Here's shot of one I took at the WCHA Assembly held in Peterborough back in '08


Original Saddle Seat by Azland Traditions

I'm assuming this design was meant to be used as true seat with folks sitting while paddling...it is quite wide and sturdily built. Since I was making a sling seat for exclusively kneeling, I figured that the dimensions could be narrower.

While Tom's design is stunning, there was one more issue I had with my personal style of paddling. After maybe an hour or so paddling on one side, I might switch sides and heel the boat the other way to give muscles a needed break. This means the seat would need to be able to slide from the extreme port to extreme starboard side of the boat. Tom's design with its 4 independent straps doesn't allow for instant adjustment. The buckles would need to be undone and the seat repositioned each time.

Another option was for the seat to "ride" on webbing straps tied to the inwales. Stewart River Boatworks sells a canvas canoe seat with webbing that looks promising as well but hand stitching waxed canvas isn't my idea of fun.


Stewart River Canvas Canoe Seat

Eventually, I came across BigBlue's post on WildSurvive featuring a pic of his homemade sling seat made of a combination of leather and webbing straps.


BigBlue's Leather Sling Seat

His design with two layers of leather laced together riding on webbing straps strung across the boat fit the bill. I didn't have enough leather on hand to mimic his design and wasn't crazy about the lacing idea.

So my own version involved a 8" wide by 20" long piece of veg tan leather along with two 6ft long, 1-1/2" wide straps to sling across the inwales. The straps would be fashioned into a simple belt. To prevent the edge of the leather seat from digging into the skin, I thought I would fold over the edges and lace them in place by playing around with some grommets and scrap piece of leather lace.


8"x20" piece with grommets


Edges folded in and tightened with lace

Leather is a suitable medium for pyrography and like my EBook cover made a while back, I obviously wanted some canoe related theme. I was aiming for a sort of old-fashioned, western look with a paddler & bark canoe rather than a typical horse & rider scene. After finding some clipart on the web, here is my adaptation.


Burned decoration

Of course the leather gets darker when stained and treated with waterproofing finishes but here is the completed project...


Finished saddle seat

Before the very late freezeup of the lake this year, I got the chance to try out the sling seat on a short jaunt. Here's how it looks on strapped in...


Buckled into the boat

Because of the rib positions and the dimensions of the actual seat, the belt straps don't end up running parallel so the seat can't slide completely side to side as originally intended...oh well. I also seemed to have lost one belt keeper loop that keeps the straps nice and taught at the inwale, but all in all, it worked well. I ended up moving it one rib location further astern than the pic after giving it a trial run and this allowed to get into a full kneeling position behind the centre thwart if I wanted to and then quickly come up onto the seat if needed. Overall, it was more than sufficient to support my (ever growing) weight and is comfortable enough when paddling in the kneeling position to keep the weight off the heels. Plus, being a not permanent and removable accessory, it can be taken off and put into another canoe if needed.


Saturday, February 26, 2011

Paddling Themed Nook Case

A while back I posted a writeup about the Nook eReader I purchased. It's been a fantastic way to read some classic literature and canoe related adventures. My intention is to take this lightweight device on some paddling trips for those rainy / lazy days where you want to read in camp.

As a winter project, thought I would try my hand at creating a leather case that would serve to protect the device in a basic way (although it would certainly be stored in a waterproof drybag during trips). With some leather scraps I had on hand, ended up using a vertical flip top style case that seems to work nicely.

A piece of leather was wet molded around the Nook and then stitched to a sturdy backing. I made a slight measurement error so the front piece isn't perfectly symmetrical and my handstitching is sloppy too but this isn't meant to be a masterpiece.


Molded leather front; Pieces stitched together

Along with some rivets in the corners, I used a mystery braid technique to make a piece that runs across the top of the device. Another scrap piece of suede was reused by glueing it to the back and this allows the Nook to slide in nicely will protecting the back from scuffs. In addition, I cemented a scrap piece of open cell foam that came from some packaging a while back...nice to reuse this stuff instead of just throwing it away. With the cover folded down, the foam protects the screen adequately.


Suede and foam inserts; Device in the case

The fun part was deciding on how to decorate the cover. Of course it had to be a canoeing theme and I decided to replicate one of the illustrations from Thomas Sedgwick Steele's 1882 classic, Paddle and Portage. The image is entitled "Sunrise on Echo Lake" and it seemed to be the perfect one to try and burn with pyrography. I modified the original a bit by foregoing the image of the rifle (don't paddle with firearms) and added some lashings to the gunwales as well as some gummed seams to the hull so that it somewhat resembled my own birchbark canoe.


Burning the image

I tried my hand at tooling by wetting the leather a bit and attempted to bring out the image by stamping some of the image to create "waves" on the lake. Didn't turn out to well and frankly, I don't like the constant pounding needed for leather tooling...not relaxing at all. To secure the cover flap, some remnant latigo lace was woven into a 3-ply braid and secured in a figure 8 pattern. All I need to do is gently pull the knotted ends outwards and it holds the flap in place nicely


Completed Canoe Case

Might seemed odd that I ended up making a totally rustic case for a modern electronic device, but when you're desperate to go canoeing, you come up with some wonky ideas.


Sunday, December 13, 2009

Refurbished Woods No. 200 Pack: Finished

Finally got around to organizing the photos of my completed refurbished canvas pack project. All that was left was the making of the tumpline. This was quite straightforward and is nearly identical to the Canoe Tump made earlier. This pack tump however, has 1" wide tails that are only 10" long to fit the pack's buckles and is also riveted rather than assembled with brass Chicago screws.


Copper rivetted pack tump; Buckled into place

When taking the pack out for a test run, it was loaded up with plenty of stuff, including some heavy junk (a few 5 pound splitting wedges, hammers, etc.). Sure enough, the frameless pack is a awkward with the shoulder straps alone. But with the tump in place, the weight is held closer to the spine and placed more strategically between the shoulders. Just like the tump carry with the canoe, you need to lean forward a bit, but at the right balancing point, even the hands can be released as you feel the weight transfered to the spine. At full capacity however, I'll likely be gripping the tump strap with both hands for a more balanced carry. Here are some lateral shots taken a while back. This past weekend, the area was hit with 110cm of snow in 48hrs and is now transformed into a winter wonderland.


Shoulder straps alone; Balanced with the tumpline

After taking these shots, I realized I forgot to give the axe holder a test run. With the axehead strapped into the holder and the handle secured with leather lace through the packs eyelet rings, the axe is quite secure in position.


Axe holder of the No.200 Pack

Overall the whole pack has now been transformed and has many more years of use left in it.


Before and...


...After

Out of curiosity, I visited a local outfitter that had a Woods No.1 Special pack for sale ($115 CND + tax). After spending all this time working with my own version, the new models seem to be made with thinner canvas and the leather components made from cheap veg-tanned leather that had not been treated for outdoor use. I imagine that after exposing the pack to the elements of a canoe trip the leather would quickly harden and crack. The cheap splash rivets were attached with minimal support, just leather "washers" on the inside which were weren't even stitched into place. The splayed edges of the rivets were sharp and could easily tear any waterproof drybag inside the pack. Even the tumpline had sharp edged rivets protruding which I pictured cutting into the fingers of the poor soul who tried to hold onto the strap. All in all, a sad testament to the so-called "quality" of today's workmanship compared to years gone by.


New No.1 Special Pack; Tumpline with sharp rivet edges - very shoddy


Older Posts Home Page