Showing posts with label tools. Show all posts

Saturday, August 1, 2020

New Crooked Knife

Amidst the Covid19 lockdown, I realized I lost one of my favourite carving tools - this crooked knife made back in 2010.

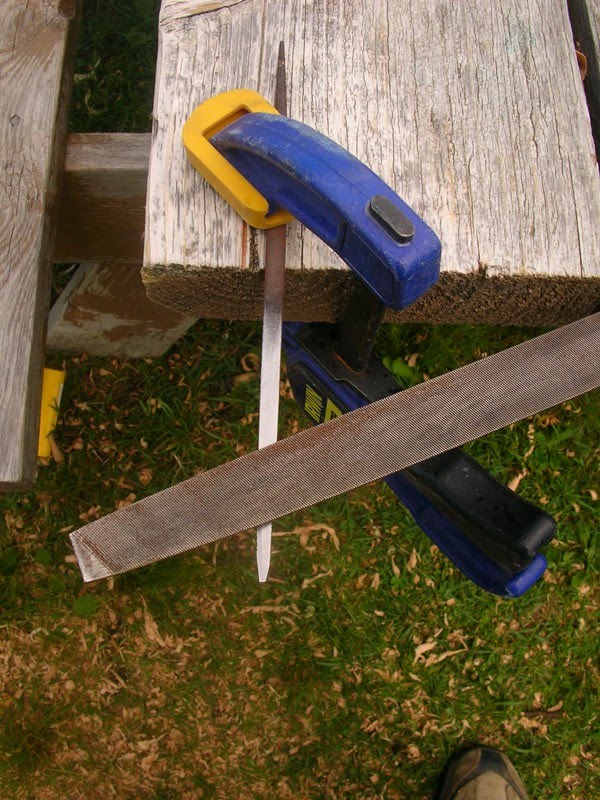
So part of my quarantine was spent making another blade from an old file and creating a new crooked knife. In the end the loss of a favourite tool allowed for some more customisation on this one. The blade is set to a comfortable angle for me with the handle carved from a piece of hard maple. Also made it more decorative with a rounded scroll on top with chip-carved mimicked pattern burned along the sides


I screwed up the delicate carving of the recess for the tang and it ended up being far too loose. Not traditional, but the blade was set with some epoxy putty and then wrapped with some leather lace. It seemed fitting that a canoe paddle should be burned onto the design as well.


Been testing it out on a bunch of mini-paddles I've been working on. It is carving well...


Friday, December 30, 2016

Miscellaneous projects using up scrap paddle wood

I've been using up the many scrap cutoffs from paddle making for a variety of projects.

Came across a neat idea for a sanding tool which seemed useful for handling the contours of a paddle, especially the shaft and throat area. It is my version of a "MacFarlane Bow Sander". I ended up purchasing a set of three 1" by 30" strips meant for a belt sander and used some walnut scraps along with a flexible strip of sassafras for the crosspiece. Also shaped some sassafras pieces into squarish dowel square to wedge and hold the sanding strip in place. Here are the pieces laid out for a visual.


The springy sassafras cross bar provides enough flex to bend and hold the sander under tension. While cutting out the slots in one of the walnut handles for the cross bar, a chunk chipped off so the slot became slightly too large. A thin wedge of sassafras must be jammed in to prevent any wiggling but the whole tool is pretty solid. It'll get some usage in the spring when I can start sanding outside again.


Also decided to use additional scraps to make some camping tools for my boys. Rather than learning proper technique with sharp tools, thought it would be proper to make some wooden toys so they could play and practice safely first. A piece of sassafras looked like an axe head to me and a cutoff of cherry had the contours of a handle. So they were put together but I couldn't find the camera to take pics at the time.

Then I read about a way to artificially accelerate the oxidizing process to turn the wood into a dark grey colour. It involves a mixture of rusty nails, vinegar and black tea.  Found the camera for this step and took pics of the natural sassafras turning into a dark black stain using this natural method. Might be a neat trick to artificially age some future paddles as well.

 Side of wooden axe head before staining


Surface oxidized with vinegar and tea mixture 


Also used some more sassafras bits to make a toy bucksaw and decided to stain "the blade" in a similar manner to look like metal. A canvas and leather case was also stitched up with some scraps.

Sassafras bucksaw

Disassembled  with case

Also still had various handle blanks cut back in '08 when making some custom carving tools. Just couldn't bring myself to burning these bits of hardwood. So these were used to make some toy tools similar to my own set for making the birchbark canoe. There's a basic belt knife with walnut handle and sassafras blade as well as a crooked knife with the same blade / handle combination


Belt Knife


Crooked Knife


Used up more bits to make a chisel, a triangular awl and even a little firesteel rod replica.


Here are all the goodies spread out on the table. Planning on making a kid's sized pack basket to put them all in so we can have some camping / bushcraft fun next season.


Camping & Bushcraft Tools



Thursday, December 22, 2016

Red Pine Paddle and Canoe Cups from Luc Poitras

Paddle maker Luc Poitras has submitted more photos of his work, including this paddle made from Red Pine:


Here are some of Luc's canoe cups made from various woods...


A crooked knife with etched handle and copper wire wrapping.


Wednesday, March 2, 2016

Luke McNair's Crooked Knives

Paddle maker Luke McNair has been quite busy as of late making some mocotaugans / crooked knives. The blades are made from O1 tool steel and shaped by hand with files! Each of the handles are carved the traditional way with an axe plus knife and then finally burnish with antler. The right handed knife shown below was a present for a friend. It features a carving of her dog that always crosses his paws. What a great way to personalize a knife handle!


This left handed knife with the initials “E.S.” was carved as a gift for Elspeth Soper who also built a Cree style canvas canoe and documented it well on her blog. Both this handles and the previous were carved from Rowan (also known as Mountain-Ash), which Luke collected from a fallen tree a while ago.


This final knife is one Luke deservedly made for myself. The handle is spalted beech.


Beautiful work Luke! Don't go disappearing under a mountain of wood shavings!


Thursday, February 11, 2016

Cree Cultural Institute - Crooked Knife

Another beautiful artifact in the Aanischaaukamikw Cree Cultural Institute online exibit is a beautiful looking crooked knife with an fiddle head handle. The webpage features a little artifact applet that lets you rotate the image to get a 360 degree view. Here are some screenshots.


Cree Crooked Knife
Aanischaaukamikw Cree Cultural Institute


The page also has a quote by canoe builder John Kawapit that highlights the importance of this critical tool...

"In the past they used a rock or bone to make a crooked knife but today we use metal. A file that is worn out and unusable is what we use. We put it in the fire so that the threads melt off, and then we hammer it and mould it into a crooked knife. When it’s heated, we bend it. As it heats some more and becomes white-hot, we put it in cold water, and it hardens.… I’ve heard it said that of all their belongings, the snowshoes were held in the highest regard because they created mobility in the winter, and in the summer, the canoe was the same. But I think the crooked knife is the most important because you use a crooked knife to make canoes and snowshoes!"
– Job Kawapit, Whapmagoostui


Sunday, July 4, 2010

Canada Day Weekend Holiday

Hope all the Canadian visitors to the site had a great Canada Day break. We were fortunate to score some time up at the cottage where the weather was phenomenal. The little one got to enjoy his first canoe jaunt of the season in our small fiberglass clunker.


Future Voyageur enjoying the ride

Also had time on the weekend to work on a series of ongoing projects. I've been slowly working on a birch Kuksa cup since last fall and it's progressing quite nicely with the Orien Crooked Knife. Learned that bourbon and crooked knife carving don't combine well as I sliced open my left thumb (and grossed out the Mrs.).


Kuksa work before the blood-letting

With the thumb bandaged up, I diverted my attention to making a canoe awl from a rusty, triangular file. When I worked on the bark canoe project, I simply ground down the tip of an old Phillips screwdriver to a point. It worked, but I want a lasting tool as part of my growing kit. The file was annealed in the evening campfire by simply heating up to cherry red and then letting it cool slowly in a can of pre-collected ash. The next day, the rust and teeth were easily ground off with a file. A sharp tip was shaped easily, the tang broken off and the awl epoxied into a birch cutoff that formed the handle. A nice evening of pyrography decoration (& more bourbon) to match my crooked knife and it was done.


The Rusty File; Filing off rust & teeth; Forming a pointed tip


Completed Awl Decoration

I was intrigued by this fantastic leather braiding tutorial by Schwert on making a dogbone awl sheath. Orien M was kind enough to send some rawhide when I ordered the knife blade and a portion was used to serve as the core of the sheath. The twisted wet rawhide was secured over the greased blade with some waxed thread and dried overnight.


Wrapping wet rawhide around awl blade

Over 2 evenings with lots of frustration given my pudgy fingers and bandaged thumb, I ended up with my simplified version of his decorative sheath, complete with a single Turk's head knot at the end and waxed thread whipping at the tip.


Leather Braided Rawhide Core Sheath


The growing tool collection

I was planning on improving the improvised sheath for the crooked knife too but that'll have to wait.


Sunday, March 30, 2008

Hook & Crooked Knife Sheaths

When I purchased the Frosts Hook Knife at LeeValley it came without a sheath, simply wrapped in tissue paper. Since that time, I've managed to slice my thumb and fingers open a few times on this double-edged, razor sharp tool. Simply storing it wrapped in material wasn't keeping it or my fingers protected so a sheath was in order. While giving the Canoe project a bit of break, I set out to come up with cover.

I got an idea seeing a creative sheath on Flickr posted in Nickshep's gallery. From the photos, it seemed to be a folding sheath with a coiled bit of leather to protect the blade.


NickShep's creations posted on Flickr


I had a few scraps of leather lying around and thought I'd try something similar, but quickly realized his leatherwork skills far exceeded my own and my paltry supply of scraps wasn't suitable. So I used what I had and came up with a simple sheath by folding a piece of scrap leather in half, punching some holes, and stitching them with a bit of leather shoelace that could be tightened and loosened as required. I obtained the lacing pattern from Ian's Shoelace Site, a fantasticly esoteric and practical site on various lacing and tying techniques. Gotta love the internet for sites like this one! Anyway, I decided on the Roman Lacing method and finished it with a tie off around the back which keeps the knife in place. Not the most aesthetic solution, but a practical one that'll save the blade and my clumsy fingers.


Hook Knife sheath with Roman Lacing


After receiving the crooked knife with the Canoe Model Kit, I realized that this unique blade would need a sheath too. Basically the same design as before made with some scrap leather, a hole punch and left over leather shoelace. The leather piece wasn't perfectly symmetrical but I was too lazy to bother trimming it perectly flush. This was supposed to be a basic protective cover here and didn't really care about looks. For the lacing pattern, I chose the the Double Helix Lacing which spirals down the edge while being easy to tighten / loosen with one hand. Now that the knives are protected, I can get back to carving.


Punching out the holes


Tied Sheath


Crooked & Hook knife sheaths


Wednesday, March 12, 2008

Tool Inventory

Back when I started this blog, I wrote a brief post regarding tools needed for paddlemaking. With a sunny day (-2 Degrees Celsius) lighting up the balcony, I thought I'd take some pics of my assortment of tools used in the process of carving custom work. Since starting this hobby, I've acquired more tools to make the job easier, including a Random Orbital Sander and a Power Planer (both at 50% off), but these are rarely used because of their noise. Below are shots of the tools organized by category and at the end of the post, I show the bare minimum tools I use to get the job done. The tools and various items were either hand me downs or purchased at Home Depot / Canadian Tire / Lee Valley Tools. Since I don't have a proper workshop, they are stored in 2 large plastic bins in the locker room when not in use. Eventually, I hope to be skilled enough to use just an axe and crooked knife like Master Canoe builder César Newashish demonstrates in the classic 1971 National Film Board movie, César's Bark Canoe. Until then, I use the basic hand tools illustrated below.


Measuring Tools
(Top): 40" Metal Straight Edge; (Left to Right): 12" Combination Square, Measuring Tape, Spring Calipers, HB Pencil & Sharpener, Retractable Chalk Line Kit


Cutting Tools
(Left to Right): Standard Coping Saw with Replaceable Blades, Keyhole Saw, Curved Edge Mitre Saw, Fine Toothed Crosscut Saw


Clamping Tools
(Left to Right): Various small (8") clamps, 2 x medium 12" clamps, 3 mini 5" dollar store clamps, screw vice; (Top): 8" Tripper Grip clamps, Gorilla Polyurethane Glue


Shaping Tools
(Top Row): Hand Plane, Block Plane, Flat Rasp, Round Rasp, two sided file, 1/2" Chisel, Contractor Spokeshave, 3 mini spokeshaves (for musical instruments)
(Bottom Row): Curved Cabinet Scrapers, Hook (Spooning) Knife, Hoof (Ferrier's) Knife, Dual Sided Sharpening Stone, Honing Guide, Sharpening Oil


Sanding Tools
Coarse (80 grit), Medium (120 grit), Fine (220 grit) Sandpaper, Sanding block, Sanding sponges and scouring pads


Finishing Tools
Various empty cans for varnish & solvents, sponge (for wetting the blade), Methylated Spirits + J-cloth (for cleaning after sanding), Helmsman Spar Varnish, Mineral Spirits, Protective Rubber Gloves, Foam brushes (12 for $1 at Dollar Store!), Aluminum Drip Trays, SuperFine (0000) steel wool


Minimum Tools for Paddlemaking
Sandpaper (80, 120, 220 grits), Sanding Block, 40" metal straight edge, 12" combination square, spring calipers, pencil, flat rasp, round rasp, block plane, spokeshave, fine toothed crosscut saw, coping saw & blades
NOT SHOWN: varnishing tools


Older Posts Home Page