


Future Voyageur enjoying the ride
Also had time on the weekend to work on a series of ongoing projects. I've been slowly working on a birch Kuksa cup since last fall and it's progressing quite nicely with the Orien Crooked Knife. Learned that bourbon and crooked knife carving don't combine well as I sliced open my left thumb (and grossed out the Mrs.).

Kuksa work before the blood-letting
With the thumb bandaged up, I diverted my attention to making a canoe awl from a rusty, triangular file. When I worked on the bark canoe project, I simply ground down the tip of an old Phillips screwdriver to a point. It worked, but I want a lasting tool as part of my growing kit. The file was annealed in the evening campfire by simply heating up to cherry red and then letting it cool slowly in a can of pre-collected ash. The next day, the rust and teeth were easily ground off with a file. A sharp tip was shaped easily, the tang broken off and the awl epoxied into a birch cutoff that formed the handle. A nice evening of pyrography decoration (& more bourbon) to match my crooked knife and it was done.

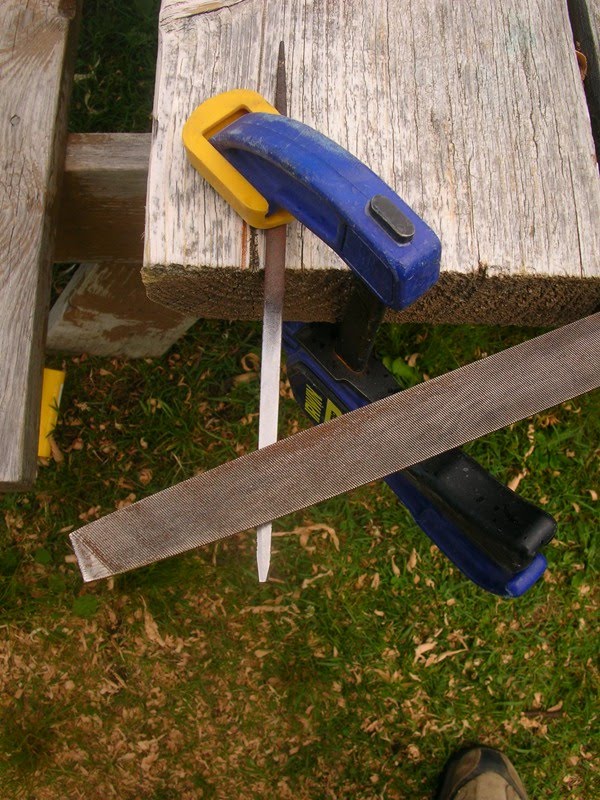

The Rusty File; Filing off rust & teeth; Forming a pointed tip


Completed Awl Decoration
I was intrigued by this fantastic leather braiding tutorial by Schwert on making a dogbone awl sheath. Orien M was kind enough to send some rawhide when I ordered the knife blade and a portion was used to serve as the core of the sheath. The twisted wet rawhide was secured over the greased blade with some waxed thread and dried overnight.

Wrapping wet rawhide around awl blade
Over 2 evenings with lots of frustration given my pudgy fingers and bandaged thumb, I ended up with my simplified version of his decorative sheath, complete with a single Turk's head knot at the end and waxed thread whipping at the tip.

Leather Braided Rawhide Core Sheath

The growing tool collection
I was planning on improving the improvised sheath for the crooked knife too but that'll have to wait.


No comments:
Post a Comment