Showing posts sorted by relevance for query shaving horse. Sort by date Show all posts

Wednesday, February 20, 2008

Shaving Horse - First Edition

After 10 paddles carved on the balcony furniture or picnic tables at the cottage, I decided it was time to build a shaving horse. This would essentially allow for the hobby to be completed indoors during the winter months in my condo locker room. I first used a shaving horse at the Canadian Canoe Museum's Preserving Skills workroom with heavy hardwood stations built by Don Duncan. They were great to work on, but I knew that for my needs, a smaller version would suffice.

The priorities for me were:
  1. Portability - it needed to be able disassemble / fold for minimum space & storage into my tight locker room
  2. Lightness - weight was an issue for transportation / use
  3. Cheap - wanted to re-use waste wood for ecological and cost reasons.

So I set up planning a design after checking out sample pics on the web. The ones at the Canoe Museum were "Dumbhead" style that worked on a lever built into the centre of the bench as opposed to "English" style that had a frame style vise which would be more cumbersome while working on a long paddle. Furthermore, most designs I saw required permanent fastening with wood screws that prevented any form of foldability. This wasn't feasible in my limited workspace. But while contemplating ideas to get around this dilemma, I came across a large industrial door hinge left over from another project when looking for tools & scrap materials for the build. The hinge would be the answer I was looking for.

As luck would have it, I had purchased some plastic sawhorse brackets from Home Depot earlier in the month to make a portable sawhorse for use on the balcony, but then scored a great deal at Canadian Tire for 2 folding metal sawhorse ($8.99 each - normally $34.99!). So the brackets sat unused until deciding to use them for the horse. With some old 2x6 and 2x4s, the industrial door hinge, and the brackets I ended up constructing the basic design.


For the anvil, I had some 1x3 and pressure treated lumber scraps that I screwed together. The base was made with some more scraps joined together to form a foot pedal that attached with some 3 inch carriage bolts found in a bucket full of old nails & screws. To fit the completed vise on the horse, I ended up drilling 4 pilot holes in the 2x6 and cutting out a rectangular slot with a coping saw.


Once disassemble and packed, the whole horse takes up little space. The parts fit nicely on the frame and with a couple of velcro straps, everything can be easily transported. Assembly is easy too. The anvil is held in place with a 6" carriage bolt.


The height & angle of the workbench can be adjusted with a scrap piece of wood wedged under it. It is held in place no problem once some foot pressure is applied to the vice. So the door hinge idea worked


The final product


Taking the horse for a ride


Overall, I'm quite happy with it. Pretty low cost & labour given that the materials were lying around anyway. The one mistake I made was making the slot for the anvil too wide and as a result, the anvil leans to one side when pressed down with the foot pedal. I'm now working on a solution (a better anvil) using a thicker maple scrap piece cut from making the maple white water paddle this past summer. More on that "upgrade" later.



Friday, February 29, 2008

Shaving Horse - Improvement

Back when I blogged about my first attempt at a Shaving Horse with scrap wood, I mentioned my error of making the slot for the anvil too wide. This resulted in the anvil head leaning to one side and not fully clamping the paddle when pressed. So to solve the problem I needed a new clamping head that would be as wide as the workstation.

I found what I was looking for in my growing scrap pieces pile - a piece of rough-sawn yellow poplar that had been severly chiped on one edge, resulting in a bit of a natural point. I cut off a 5.5 inch wide piece, the actual width of the 2x6 board used in making the horse. The picture shows where I cut it from the stock and a rectangular through mortise I cut out to attach it to the anvil.

I quickly realized that a scrap piece of disfigured maple (with a major knothole) I had been keeping would be the perfect piece to complete the anvil. It was just a slight bit more narrow than the slot I had cut in the horse so there was no chance of the anvil wiggling from side to side when pressed with the foot pedal. By cutting a through tenon that would fit in the poplar head piece, I'd be able to make a stronger anvil that would still be able to be disassembled. This would be my first attempt at cutting something like this, but with a few careful measurements I proceeded to cut out the maple stock with my regular cross-cut saw and ended up with a crude, but satisfactory tenon for this project. To finish off, I used a 1 1/4" spade drill bit to cut a hole for a hardwood dowel. This I ensured was a 1/4 inch lower than where the anvil head would rest so that I could custom fit a dowel and secure the head in place.


Measured tenon lines and final anvil

The hardwood dowel scrap I had lying around was flatten on one edge by clamping it to a vise and using the handy spokeshave. This way, when inserted in the hole it would press flat against the top of the poplar anvil head and hold it in place tightly. This took some trial and error to get right as I didn't want to over shave the dowel piece I had on hand. Everything worked out well and the head fits nice and tight. On the horse, I drilled 2 more hole positions for the 6inch carriage bolt used as the fulcrum so as to be able to move the vise closer or further away as the project demanded.


Flattened Dowel & Assembled Headpiece

Ultimately, I wanted to re-install the foot pedal system on the first edition, but fitting it with the maple piece required to much extra reshaping of the wood. So I just used the spade bit to drill another hole for the remaining bit of scrap dowel and that is used as a pedal. I could cut another through mortise in another scrap piece to use as a peddle and hold it in place on the bottom with a smaller piece of dowel, but I'm lazy and want to get back to paddle making.


My horse isn't going to win any prizes for looks, but this new edition folds down well for storage & transport and suits my current paddle making needs.

By the way, for anyone else who wants to build their own, I basically adapted my horse from the info gleamed on the following links:

• Richard Burton's plan
• Bob Smalser article at WoodCentral.com
• Tom Rettie's article at BloodandSawDust.com
• The photo intensive page at trod.org


Thursday, December 25, 2008

Christmas Canoe Gift

Merry Christmas to everyone! This year I got a special gift...some ME time to work on the bark canoe up at the cottage while my wife's cousins help out with our 3 month old. Despite the freezing temps, I set to work in the garage making some canoe slings to fit on metal saw-horses with some scrap 4x4 cedar posts and old carpet.


Canoe on slings

With the canoe safely resting on the soft carpet slings, the next job was to install the permanent thwarts that I had carved months before. These needed to be mortised into the inwales and required some trial and error shaping. I had brought up my portable shaving horse from the city on this trip and this helped while carving with the mini crooked knife and spokeshave. It took a while, but eventually all the thwarts were in nicely.


Working on the shaving horse


Mortising in the centre thwart

Holes were drilled into the thwarts and with some of the remaining spruce roots I had on hand (soaked in a "cooler" of hot water), the permanent thwarts in place. Even though my lashing job isn't as neat as many other canoes I've seen, the whole canoe seems very sturdy. Here's what it looks like now...


Canoe with permanent thwarts


Friday, June 12, 2009

Cherry Edged Beothuk - Part 2

Another paddle awaiting some attention was my attempt at a cherry edged, birch-cherry laminated paddle based on a surmised Beothuk design documented in Adney's sketches. Unfortunately the sharp recuve at the tip was too much for the cherry striped edging and the glue did not hold when the clamps were removed. The rest of the blade was fine so in order to salvage this paddle, I redrew the tip a bit higher and re-cut the blade with this ultimately, more narrow tip. A while back, I had set up the shaving horse outdoors and did some work in the brisk spring sunshine.


Split Edging; Redrawn blade


Working on the shaving horse

Adney documented the surmised grip on this paddle as a spherical bobble and this would be my first attempt at something like this. Given the cherry edging, I thought it appropriate to laminate some extra cherry pieces onto the grip which could then be eventually shaped into a sphere. The approximate grip size sketched on the birch (with internal sketches of an octagon) was cut when originally shaping the blank. Additional blocks of scrap cherry were cut to size and then sawn to remove the angled edges resulting in an octagon effect when glued up. The plan is to further shape it with a rasp down to a bobble shape confortable in the hands. Here are some images.


The initial square grip with sketching; Cherry pieces, Glued up

I still haven't worked on the paddle shaft yet as there is more fine tuning to do on the blade region, but here is the work in progress so far...


Sept 1/09 Update: Part 3 has now been posted.


Wednesday, November 16, 2011

Peter Polchies Ash Malecite

After obtaining my recent batch of lumber, I've eagerly begun carving again. In this case I wanted to try carving a wood I haven't yet worked with...ash. While I've finally acquired an old 12" bandsaw (hand-me-down from my Dad's old shop), it's been setup up north in the Cottage garage. I'm stuck in the city until the Christmas holidays so figured I'd try shaping ash plank the old fashioned way with an axe. This creates a lot of waste chips from an otherwise usable board, but this plank was quite narrow (just a bit over 4.5 inches wide) and ash isn't too premium a wood around these parts.

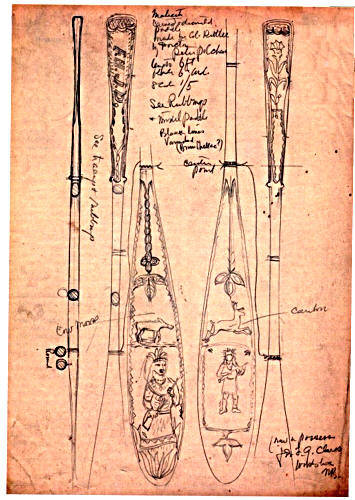
For this paddle, I wanted to try and replicate Tappan Adney's Malecite paddle sketches which appear at the back of John McPhee's famous canoeing book, Survival of the Bark Canoe. Adney's scribbled notes mention the paddles were carved and decorated by a Doctor Peter Polchies and were 6ft long with a 6inch blade. I intend all my paddles to be users so the dimensions were reduced to fit my preferred length of 58" with a narrowed blade width to accomodate the ash board.


Adney's sketches of Peter Polchies' carved paddles

After marking out the shape on the rough lumber, I made a few stop cuts with the saw and commenced hacking away. Now that we have a backyard instead of a condo balcony there's much more space and enjoyment to be had.


Paddle waiting to emerge


Sawing stop cut


Chopping away

Still not totally competent to chop right along a fine pencil line, so I stopped with the edges of the paddle looking a little ragged. They can easily be cleaned up later. A little trick I learned is to leave a few inches on the top and the bottom of the blank until the very last minute. Makes it much easier to handle the blank when wielding the axe.


Chopped out paddle blank

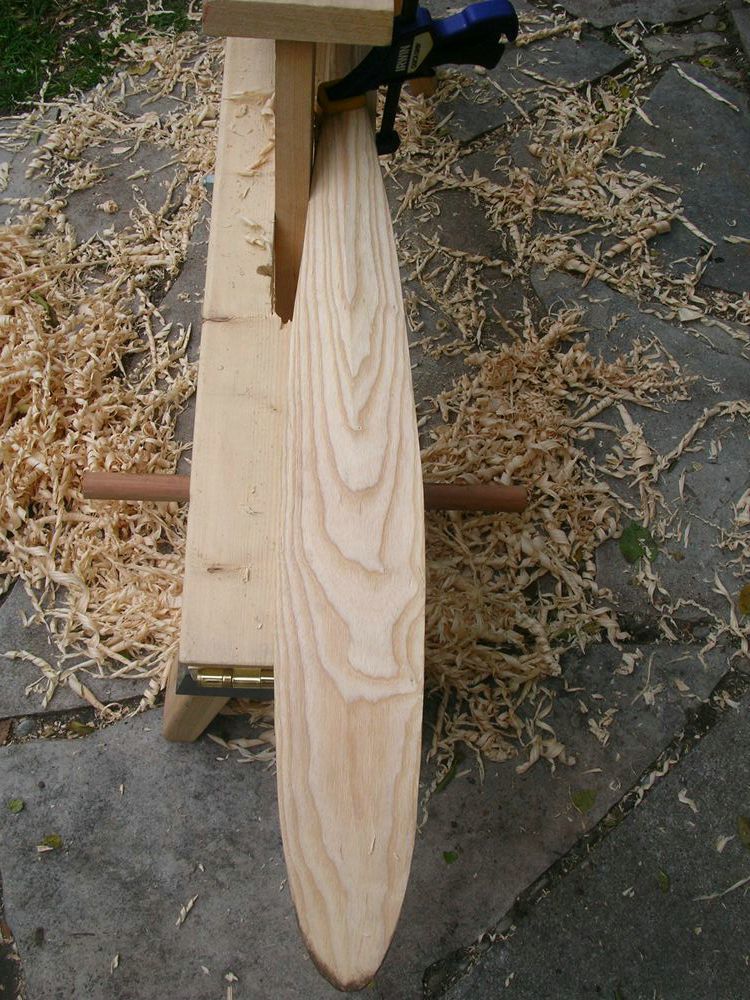
After thinning out the blade face with more axe work, I set up my portable shaving horse made way back in '08 that's still serving me well. Quick work with the spokeshave and the blade & grip were coming along nicely. Ended up with a pretty nice piece of ash - the grain isn't too difficult to work with and the pattern on one side of the blade is quite appealing. The whole paddle was thinned out quite a bit with the shaft thickness reduced down to 1" to make the whole thing light & flexible.


Set up on the horse


Grain pattern on the blade

I've purposely left the grip area a bit bulky to be true to the sketch and because of the fact that bulkier grips suit my palm just fine


Carving done

Decoration post to follow...

December 12, 2011 Update: Decoration is complete...see part 2 here


Thursday, September 17, 2015

Sassafras Guide Paddle - Slowly back to carving

Well after receiving a wonderful batch of Sassafras stock from friend Craig Johnson last summer, I've finally had time to properly cut a paddle blank out. Since converting my cherry guide paddle into an heirloom gift from my 2nd son, I've wanted to replicate the original design to serve as a heavy user tripping paddle.

Unfortunately with 2 active boys at home and other projects on the go, it's been quite a while since the shaving horse has seen any usage. After being stored outside in a sheltered spot under an outdoor table, the horse has come out a bit weathered but still functional.

Here is the blank cut out...

A new paddle in the works

At this early stage, the edges of the paddle have been smoothed down and the carving lines all marked out for carving. I still use the method taught years ago at the Canadian Canoe Museum paddle workshop. If readers care to see that tutorial, you can read a step by step method in one of my earliest earliest  posts from way back in January, 2008.


Saturday, February 23, 2008

Maple Sparrow Solo

Given my happiness with the Walnut Solo Kingfisher blade made back in September of '07, I wanted to make another. I scored a fantastic figured maple board (11ft) that I had cut into halves. The width of the board (4.5 inches) was perfect for this solo paddle design. For the grip, I wanted to try a different style...a circular spoon grip. Marking out, sawing the blank, and dressing the blade went by without a hitch. By now, my routine for setting up blanks is pretty quick.


Winter was in the air, so working on the balcony became steadily impractical. So I resorted to using my newly constructed shaving horse set up in the condo locker room for the bulk of the shaving. A drop sheet and quick sweeping contains all the shavings. Given that this was maple (quite dense and heavy), the blade was purposely thinned less than 3/8th inch (the common thickness for blades).


The spoon grip was kind of my own experiment. Circular grips are documented in Adney's Bark Canoes and Skin Boats of North America, particular with Eastern Cree paddles (a design I intend to carve after I get more lumber stock). Apparently this circular shape allows for multiple grip positions without really changing your hold...sounded good for solo style paddling with underwater recovery strokes. Rather that have a complete circular shape, I opted for more of a teardrop shape with the intentions of scooping out the palm region with a spooning knife. The initial carving out looks really rough and ragged but with enough effort (and a whole load of sanding) I was quite happy with the results.

For the artwork, I chose an image of a Song Sparrow (Melospiza melodia) - a rather drab looking, brown spotted bird that has a melodic buzzing song. It looks like most sparrows but can be differentiate with a noticeable large brown spot on its breast. The narrow blade width of the paddle was quite suited to this smaller image and given that I intented to make this my main solo blade, I wanted to minimize burning on the whole blade in case I weakened the already thinned out maple blade.


Sparrow image sketched onto blade


Sparrow closeup


Spoon grip with native Sparrow image


Whole paddle posing with winter sunshine


Older Posts Home Page