
Original leather anchor; New flap strap inserted
In front of this strap would be the tumpline buckle. With a folded strip of thin leather (slightly different colour) and a brass buckles (doesn't match the faded steel of the original), the tump buckle was created. A bit tricky to get all the holes lined up for the rivet. After pounding and setting the rivets in with an additional piece of backing leather on the inside (not shown), I realized I made the strap a bit too long and the buckle kept slipping down too much. Another hole was punched and a brass Chicago screw was mounted to secure the buckle into place. Bit of a mistake, but at least the screw matches the brass buckle so the whole thing doesn't clash too much. For symmetry, I ended up doing the same thing for the other buckle strap.


Tump buckle material; Rivetted into place
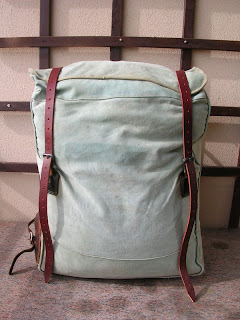
Buckle holes were punched in the flap strap at 1" intervals and a test run was done by stuffing the pack up with mounds of dirty laundry. The beauty about this design is that the straps can be placed over the topflap parallel (useful to secure a sleeping pad or other gear to the top of the pack) or cross ways to pack akward shaped items. Here are the two configurations below.

 >
>Parallel straps; Cross over closure
The project is nearly done. All that is needed is the making of a tump for the pack, which should be easy given that I made one already for the canoe. This one will be rivetted however.
Dec 13/09 Update - Pack is now complete. See last stage pics here


2 comments:
I had a pack very similar as a child.Use to keep my hatchet and plastic bags to keep rabbits and grouse in.
Funny how a pic can bring back a memory of forest roaming at 6 years old.
I hear you. Part of the reason I've gotten back into all this nostalgic gear is to reclaim some of those fond childhood memories.
Post a Comment